Christmas in July


Is it July already??!!?? The studio has officially moved into the garage! Pottery is starting to take shape in this new environment which is riddled with little fingers wanting to help dad with his “pottery”! Help that sure has good intentions but is sure to end in terror if you were a freshly thrown pot!

Working at home sure has its benefits though, quick breaks from throwing slows for spur of the moment water gun fights and yummy blackberry picking!

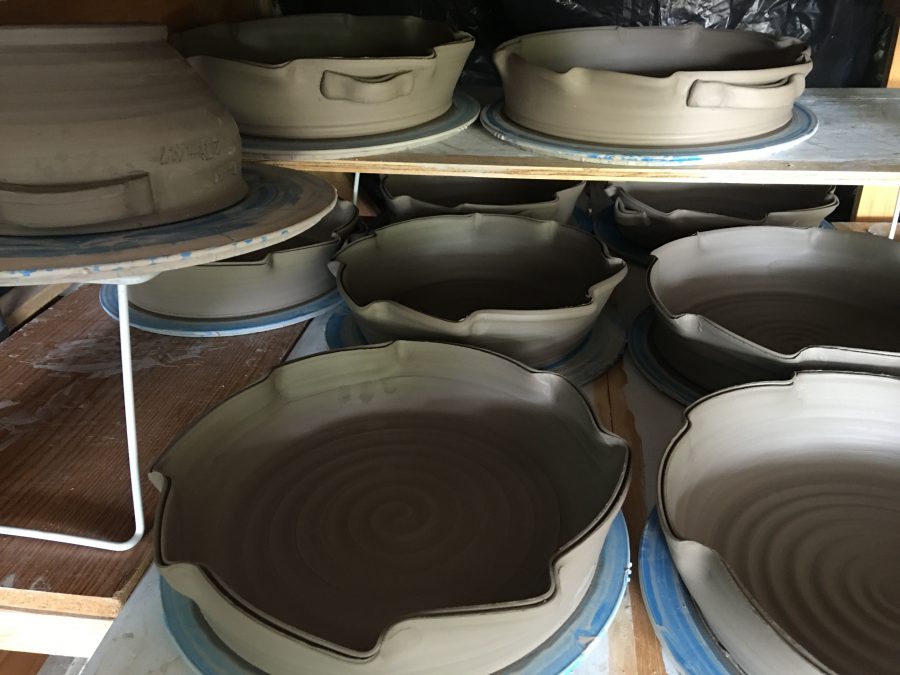
This year we are working on some new additions to our line of pottery. These nesting bowls will make their debut in Staunton Illinois in September.

BCB1A682-6742-46E2-9509-AEAC05EBCA75

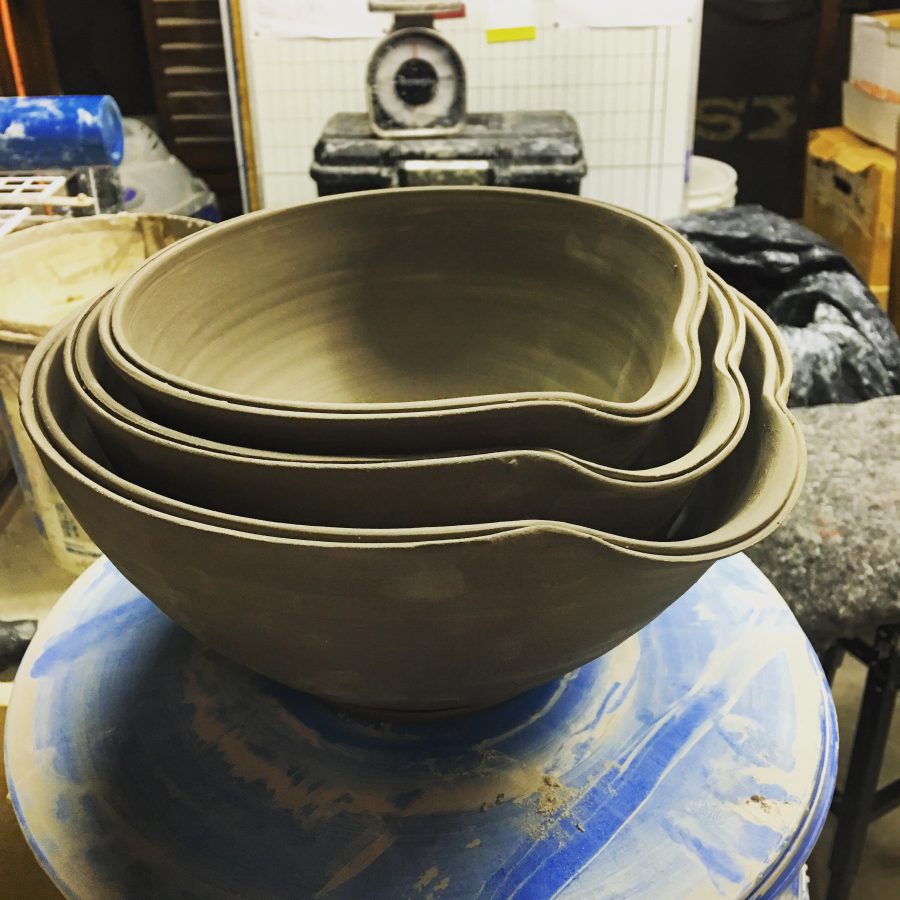
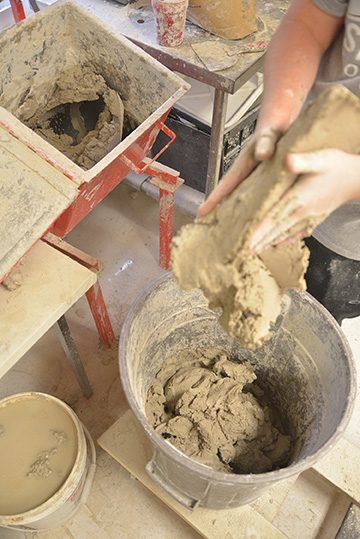
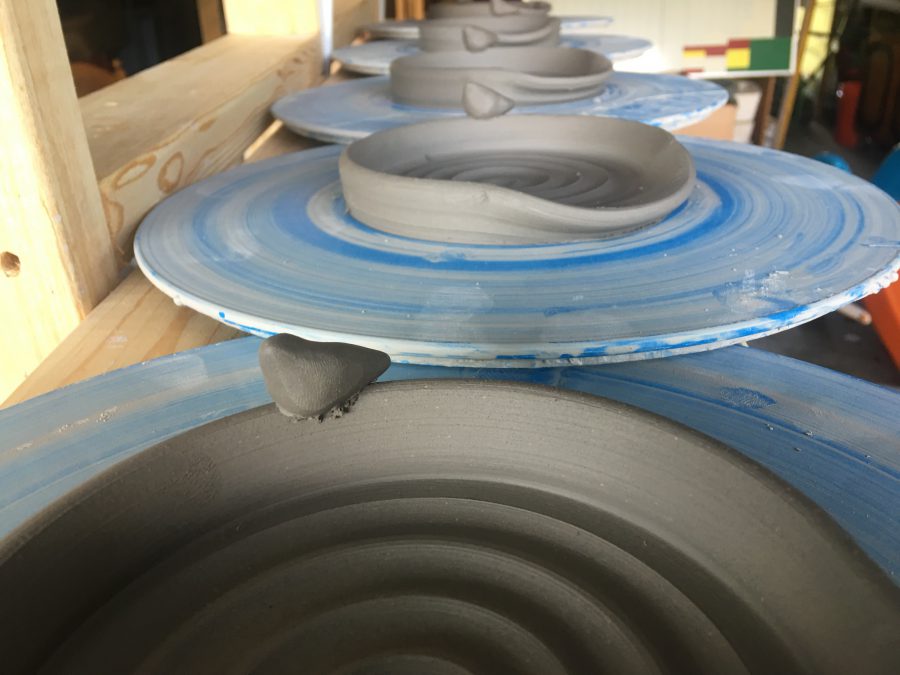
These are an adaptation to the design of our baking dishes, otherwise known as our cobbler bakers. This new design will feature handles (some with, some without) and a new rim style, similar to the ‘split rim’ design pictured above on the mixing bowls.

B339C3DA-F1BD-425D-B7DA-5D632E244F82

We will continue to offer the favorites, like the little birds nesting on top of the spoon rests.

A5AD686B-70DE-44E2-9588-459F9C529132

5A1D10DB-F57C-475F-9CE9-AEE0476B396B

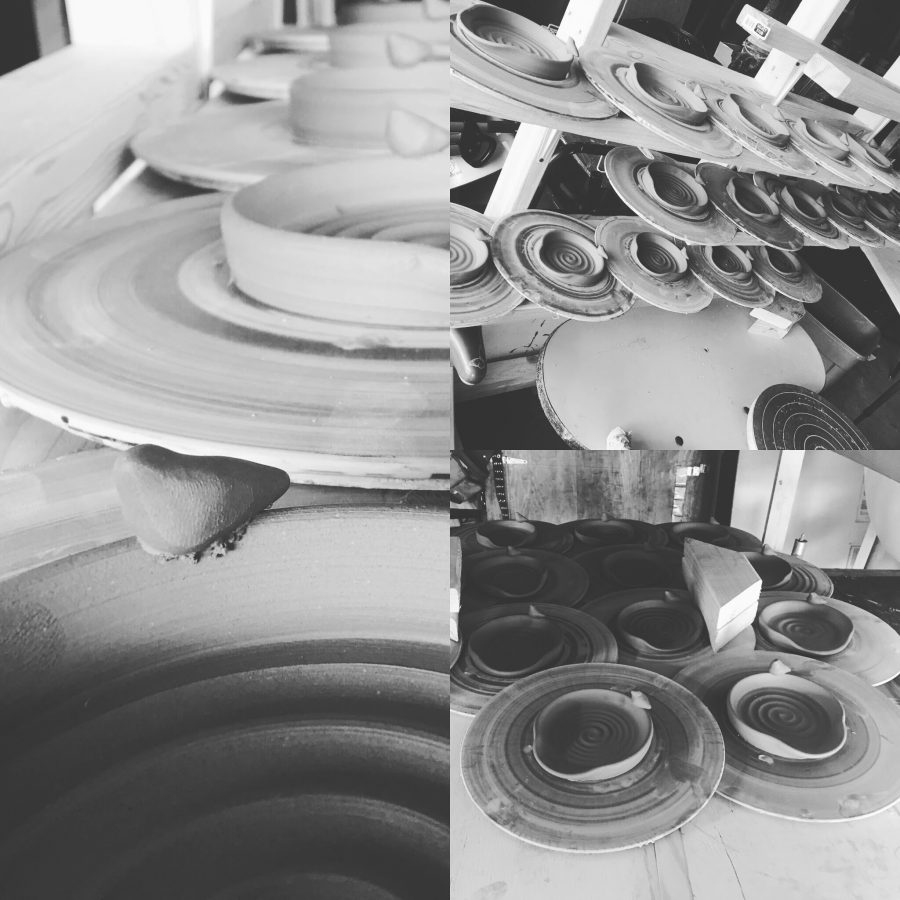
We will also continue our line of pie plates. This year look for the option of two different sizes. The Large will allow for a Small to nest inside for greater storage options. We will continue our new bread bakers (late fall 2015) they were a hit and people have sent pictures bragging about their wonderful loaves of bread.

You will also be able to find our interesting salt shakers. The salt shakers are a bit larger this year, hoping to reduce the amount of refills needed as well as still offering something that can be easily grabbed with the hand.

All of these items will debut this Fall at local area Art and Craft fairs around the St. Louis area. You will, of course, still be able to contact us directly from our Facebook page.

Look for all these new items at the DowntoEarthenware booth which is also getting a facelift. Look for unique crates to display all of our awesome functional pottery!

Christmas will come soon enough, don’t forget to complete your Christmas list early by contacting us for a one-of-a-kind dish for your loved ones!

Reclaimed and Repurposed

People get so worked up about things breaking. Not everything I throw or build survives into a finished product. There are a variety of steps that the clay takes to get to a functional piece of pottery. At any given time a piece may crack, warp, or explode. Sure, it’s disappointing because now I have to reinvest my time to create a like item, but it’s not a total loss. If the clay hasn’t been fired then all I’m out is my time because I can reuse that clay. Any clay that gets trimmed from a piece isn’t automatically garbage, either. I save all of it.

600_2029

Scraps are left on a canvas table to get bone dry.

600_2044

After the clay pieces are bone dry I rehydrate them in a 5 gallon bucket.

600_2051

600_2052

The sludgy clay is put into a mixer.

600_2054 600_2058 600_2059

Then I add enough clay powder to reach the proper consistency.

I get my clay from Krueger Pottery in St. Louis.

600_2061 600_2066 600_2068

Once the clay works through the mixture it comes out a manageable consistency that I will use to create more pieces.


There’s a similar process that we go through as humans, as Christians. In our sin and brokenness we are useless. We lack appeal and value and could easily be discarded.  However, God chose to repurpose us. He chose to give us new life. He rehydrated us with Christ’s blood and the waters of baptism. He uses the Holy Spirit to work in our hearts. After Christ we have a new purpose, we have a new value. We are redeemed  creations of the Potter. He forms us, shapes us and gives us purpose – life.

Purple Invades D2E

Here’s a peek at a few of the girls from Trinity Lutheran School‘s Troop 31:26 as they visited the DowntoEarthenware studio. A few days ago a quick mention was made of them, but now we have pictures to share as well. These young ladies were on a mission to make surprise Christmas gifts for their families. They worked diligently and certainly enjoyed the fact that they got to keep a secret from their parents!

600_1606

The girls learned various clay skills related to hand-building.

600_1621

Each young lady had her own canvas workspace where she applied texture, cut her clay and then molded her piece.

600_1619

The pieces have been fired and they are fabulous! The girls will be so pleased with the results of their hard work as they proudly present them to their families.

600_1605In just a few weeks we will post an update revealing the finished products, but for now the mystery remains!

Like a Kid on Christmas Morning!

Saturday we took a family trip to Krueger Pottery in St. Louis. Ryan is great to work with and he graciously tolerated the chaos that our brood of five little ones created in his store. He offers a wide variety of tools, glazes, equipment, embellishments, and if there’s something you’re seeking that he doesn’t carry he can certainly order for you! They even offer kid and adult classes in their studio!

One of our goals was to find a few new glazes that would work well with the newly created Nativities. We settled on three: Aqua, Spring Green and Celadon.

Sunday provided the opportunity to glaze the pieces and start the kiln, but that brings us to the worst part…waiting anxiously for the firing to finish so we can see the finished product just as a kid anxiously awaits Christmas morning! Monday night at 1100degrees the kiln was cracked for the first peek. Today things had cooled off enough to FINALLY handle the new pieces! The results were pretty exciting.

10615563_726665514094680_380126628814568503_n

Medium 3 Piece Nativity in Celedon Glaze. Joseph stands around 4.5″

1932221_726665510761347_955588132351325101_n

Medium 3 Piece Nativity in Aqua Glaze.

1907299_726665517428013_608969092822135217_n

Medium 3 Piece Nativity in Spring Green Glaze.

1456750_726634727431092_8058095069161072808_n

Large Nativity in Aqua Glaze – Nativity is around 6″-7″ tall

10730144_726634734097758_4334037202179145001_n

Large Nativity in Celedon Glaze

11106_726634737431091_1797688030238826061_n

Large Nativity in Holly’s Gold Glaze

10433123_726634767431088_6968071144415889771_n

Large Nativity in Spring Green Glaze

What do you think? We would love to hear your feedback. For pricing you can check out our FaceBook page. Nativities are being offered to Facebook fans before putting them on our Etsy shop.

Guest Artists

DowntoEarthenware hosted 17 little girls from Trinity Lutheran School‘s Troop 31:26 this afternoon. Their mission? Operation Christmas Secret. These 17 young ladies worked diligently as they crafted adorably unique Christmas gifts for their families. Unfortunately I am unable to share pictures of their creations at this time because the girls are determined to keep their families unaware. What a fun afternoon teaching technique and watching their excitement and eagerness. Sometime in mid-December the pictures of the final products will be shared.

Some Glaze Theory….

When discussing how glazes work, there are three main elements of a glaze:

  • The Glass Former

The Glass Former is the element that actually makes the glass (glaze) on the pot melt. The main Glass Former is known as Silica. Silica has a very high melting point of 3100 Degrees Fahrenheit.

  • Flux

Fluxes are chemicals used in glazes to help lower the temperature of the ‘melting point’. Most kilns don’t require a temperature of 3100 Degrees Fahrenheit to melt the glaze. For instance, most everything I fire is in the ^6 range (cone 6 = 2170 degrees Fahrenheit). In order for that to happen, I must use some flux in my glaze recipes to lower the reaction temp that the glass former requires. There is a down side to using flux in a glaze; the more flux amount used, the runnier the glaze becomes.

  • Refratories

Refractories keep glaze from running off the pot. If you have a glaze that is too runny, you need to add more EPK (Kaolin) or Aluminum, which are both refractories.

I found a great short video that explains how all three of these properties work together. Each of the three, The Glass Former, the Flux, and Refractories cause changes to happen the other.

These three components make up what is called the “Base” or “Base Glaze”. After the Base has been configured, then the potter can begin working with color elements to see how each color element can create a different look. The “Color Theory” element of glazing is something we will hold off with right now because that could take several posts. Once you start adding/subtracting color chemicals you may have to change other components too to compensate for that adding/subtracting.

I sure hope this helps you understand a bit about glaze theory!

New Process Video’s Posted on DowntoEarthenware

Every so often, we like to share some quick video’s (some with and some without audio) Since we love watching people throw on the wheel, we thought maybe you all would like to see some examples of us making the ware that you purchase.

Chicken Baker

Our newest item (yet to be unveiled) is the Chicken Baker. (We are formulating a post on how to use this to be viewed another day) Here is how it is made:

Baking Dish / Pie Plates

Our baking dishes are probably the most popular item we sell! These dishes are not only look great, but bake extremely well! We previously posted an AWESOME breakfast Crustless Egg Casserole dish on our site. Here is how they are made:


There are other process video’s on our Video’s Page. Feel free to give them a gander.
If you have any other process video’s you would like to see posted, please let us know so we can make them!
Enjoy!

Demos and Deals!

Sunshine, live music, and handmade creations made a recipe for a great weekend! DowntoEarthenware had a booth at the Staunton (IL) Art and Music Festival Sept. 20 & 21. This was a unique opportunity to connect with people and really explain each piece and its function.


Zachariah Schnare-DownToEarthenware 1

A variety of pieces were available for purchase, but we had a special deal going on with our apple bakers. With every apple baker purchased the proud new owner also got to take home an apple (recently picked from a local orchard) to try in the new baker. This is quite a tasty incentive!

Zachariah Schnare-DownToEarthenware 2

Not only was there an opportunity to connect with individuals, but there was a great opportunity for those in attendance to see the throwing process.

Zachariah Schnare-DownToEarthenware 3

Here is a finished large baking dish.   Point of interest: did you know that the notches on the sides of the dishes aren’t purely decorative? If you cut a pie from one notch to the one directly across from it all the way around the pie you will end up with 8 evenly cut pieces! It’s all about form and function, my friends, form and function.

** Pictures courtesy of Kaylan Schardan of Macoupin County Enquirer-Democrat – She visited the booth and when the article is published, we will be happy to share that link with you!

Red Hot Apples Comin’ at Ya!

Have you tried our first baked apple recipe? Every bite of it tastes like fall, doesn’t it? If you’ve tried it you’ll also know that it was super simple to assemble and bake. In fact, you were probably thinking, “Wow, this was super simple and the presentation is beautiful.” Or, “Wow, this is what September tastes like.” Or, if you’re like me, you were thinking, “Nom, nom, nom…it’s gone already?!” (Obviously my level of sophistication exceeds that of many.)

For those of you who haven’t tried that baked apple and are feeling a bit green with envy that we’ve all taken a bite out of September and you haven’t, then in the words of Smokey the Bear, “Only you can solve that problem.” Perhaps that was my fourth grade teacher….

In any event… Here are two more delicious apple baking recipes for you to savor in our fabulous apple bakers!

Red Hot Apple:

photo 3 (1)


You need one large apple and a handful of those spicy little red hot candies

Begin by coring your apple and cutting off the skin around the top of the apple. Place your apple on the spoke of your handy little apple baker.

photo 2

The second step is very simple: drop as many of those red hot candies into the center of the apple as possible and then let them mound on top.


photo 4


Bake your apple for 20-30 mins at 350. Pull it out when the apple seems done and the red hot candies are melted. ** We used larger red hots and they didn’t melt as quickly. This would probably work best with the smaller red hots. However, it did not have a negative impact on the taste of the apple. **

This apple has a similar flavor to a candied apple.


2014-08-30 14.53.15

Apple Praline:

One large baking apple

1 tablespoon butter

1 tablespoon brown sugar

2 tablespoons pecan pieces

1/8 teaspoon cinnamon

a few drops of vanilla

Core your apple, cut off skin around the top of the apple.

2014-08-30 15.02.15


Melt your butter and combine with your brown sugar, cinnamon, drops of vanilla and most of your pecans. Pack the mixture into the center of your apple and let it mound on top of the apple. Place extra pecans on top of brown sugar mixture.

photo 2 (1)


Bake at 350 for 20-30 mins.

 ** If you don’t want the pecans to get too brown you can cover your baker with foil.